Changing Your Windows 10 Default Browser
Having a built-in web browser doesn’t mean that you are limited to using just one browser. You can actually install other browsers to your machine like the most popular third-party ones known as Google Chrome and Mozilla Firefox. In fact there is a Safari browser that works with Windows and another third-party browser called Opera which boasts its being light on system resource.
You might have heard of the other web browsers that are available for free download on to your device but the question is how do you set it as your machine’s default browser when you are using the latest version of Windows 10
The very first thing that you need to do is to install the third-party browser that you want to be set as the default one for your Windows 10 machine. You can choose either Google Chrome, Mozilla Firefox or any other browser that you want and be sure to install the version that works with your Windows 7 system type (whether it is 32-bit or 64-bit).
Once you are done downloading the browser that you want, you can go ahead and install it so you can proceed to the next step which is setting it as the default web browser for your Windows machine.
2 Ways in Changing Your Default Browser
- Changing the Default Browser From Its Settings Section
After you install the third-party browser that you wish to use as your machine’s default browser, it would automatically open and ask you to go through some simple setting up steps. This would help prepare your browser to work as you want it to and most browsers would even allow you to import browsing history, contacts and other data stored in your previous default web browser to the newly installed one.

If you installed Google Chrome and you want to set it as default browser, it would automatically tell you that it is currently not your default browser and a button that says “Set as default” will appear on the right portion as shown on the screenshot above. From here, all you need to do is click on the button itself and you are done setting it as your machine’s default web browser.
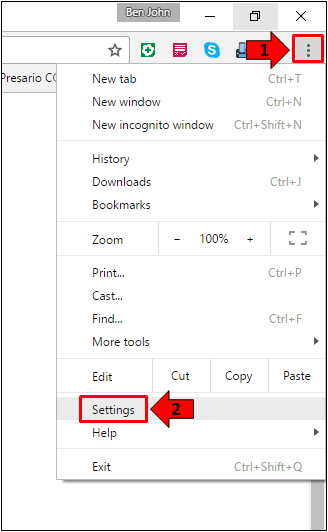
If this prompt does not appear, you can go ahead and access the Settings section of the browser that you want to be set as default. In Google Chrome, you will need to click on the 3-dotted button that is found at the top-right portion of an active Chrome Window then from the options box that will appear, you will need to click on the link that says “Settings” as you can see below.
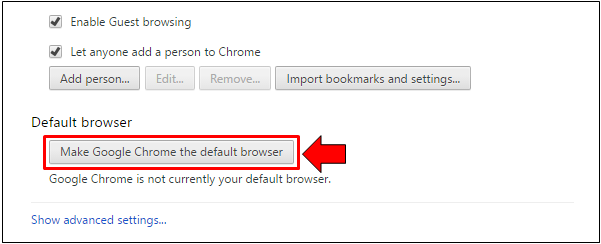
After you do so, a new tab will open and show the “Settings” section for Google Chrome. From here, all you need to do is scroll down until you reach the “Default browser” section where you will need to click on the button that is labeled “Make Google Chrome the default browser” as you can see being highlighted on the screenshot below.
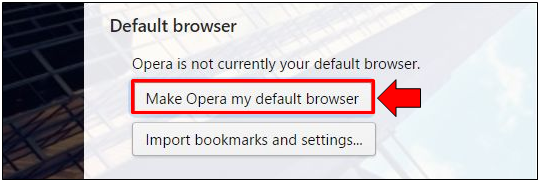
Other browsers will also have the same button or a similar option available in their setting section such as the one that you see below from Opera Web Browser. If you want to set a third-party as default then this is the easiest method that you can use since it doesn’t require you to leave the browser Window.
- Changing the Default Browser from the Settings App
Microsoft has created a hybrid operating system and named it Windows 8 then further improved it to Windows 8.1 and now Windows 10. This operating system version contains the traditional Desktop environment combined with the Mobile interface which used to be found only in mobile devices. If you’ve already tried using Windows 8, Windows 8.1 or Windows 10 then you should be aware of the existence of the Control Panel’s modern counterpart called the universal Settings app.

To launch this feature, all you need to do is click on its icon from the narrow vertical bar at the left hand portion of the Start Menu. You would first need to launch the Start Menu of course by clicking on the Start Button that is found at the extreme-left end of the Taskbar or by pressing the Windows Key then click on the icon which you can see being highlighted on the screenshot above.
Most of us want shortcuts and Microsoft is aware of it and so they made a keyboard shortcut available for launching the universal Settings app. Just press the Windows + I keys on your machine’s keyboard and the Settings app should launch instantly!

The next step will now require you to access the “Default app settings” section and in order to access this quickly, just type the word “default” into the search input box that is found at the top-center portion of the Settings app homepage Window as shown below.
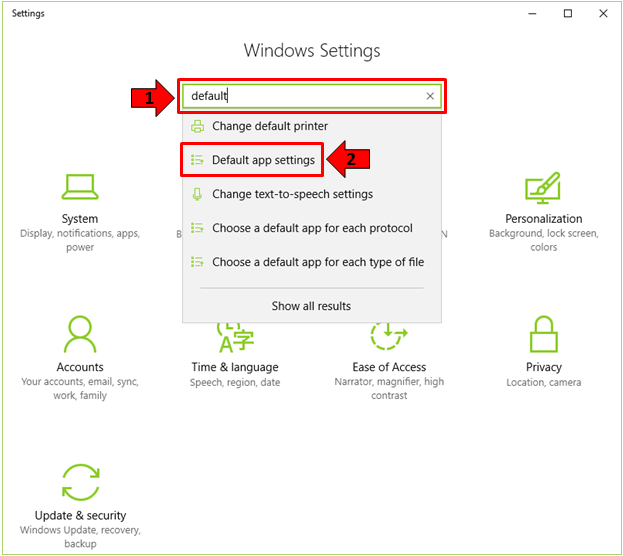
After typing the word “default” into the search box, the search suggestions should appear just below it and from here, you should be able to see “Default app settings” which you will need to click so you can be directed to the section where you can change the default web browser that your computer currently has. The “Default app settings” section looks exactly like the one that is shown on the screenshot below and in order to change the default browser, you will need to scroll down to the “Web browser” item then click on the web browser that is currently being displayed under it.

After clicking on the browser under the “Web browser” section of the “Default app settings” Window, an options box will appear which is labelled “Choose an app” and from here, all you need to do is choose and click the new browser that you want to set as default as you can see on the screenshot above. Clicking on the browser of your choice applies the change automatically without requiring you to click on any other buttons so you should now start to enjoy browsing using the new web browser that you have installed to your Windows machine.
Note : If you are not Tech Savvy or not sure/aware of technical stuffs, suggest you to contact your Technical Professionals of 13 Tech to handle the situation and provide a solution.
No Comments